
Help Article
Custom Recorder Layouts
Create custom recorder layouts, arrange screens and widgets, and use them during a flight.
Custom Recorder Layouts
Record > Recorder Settings > Custom Layouts
Custom layouts allow you to create unique recording layouts based on your specific needs. You can create multiple screens or stick with one screen; it’s up to you!
Create a custom layout
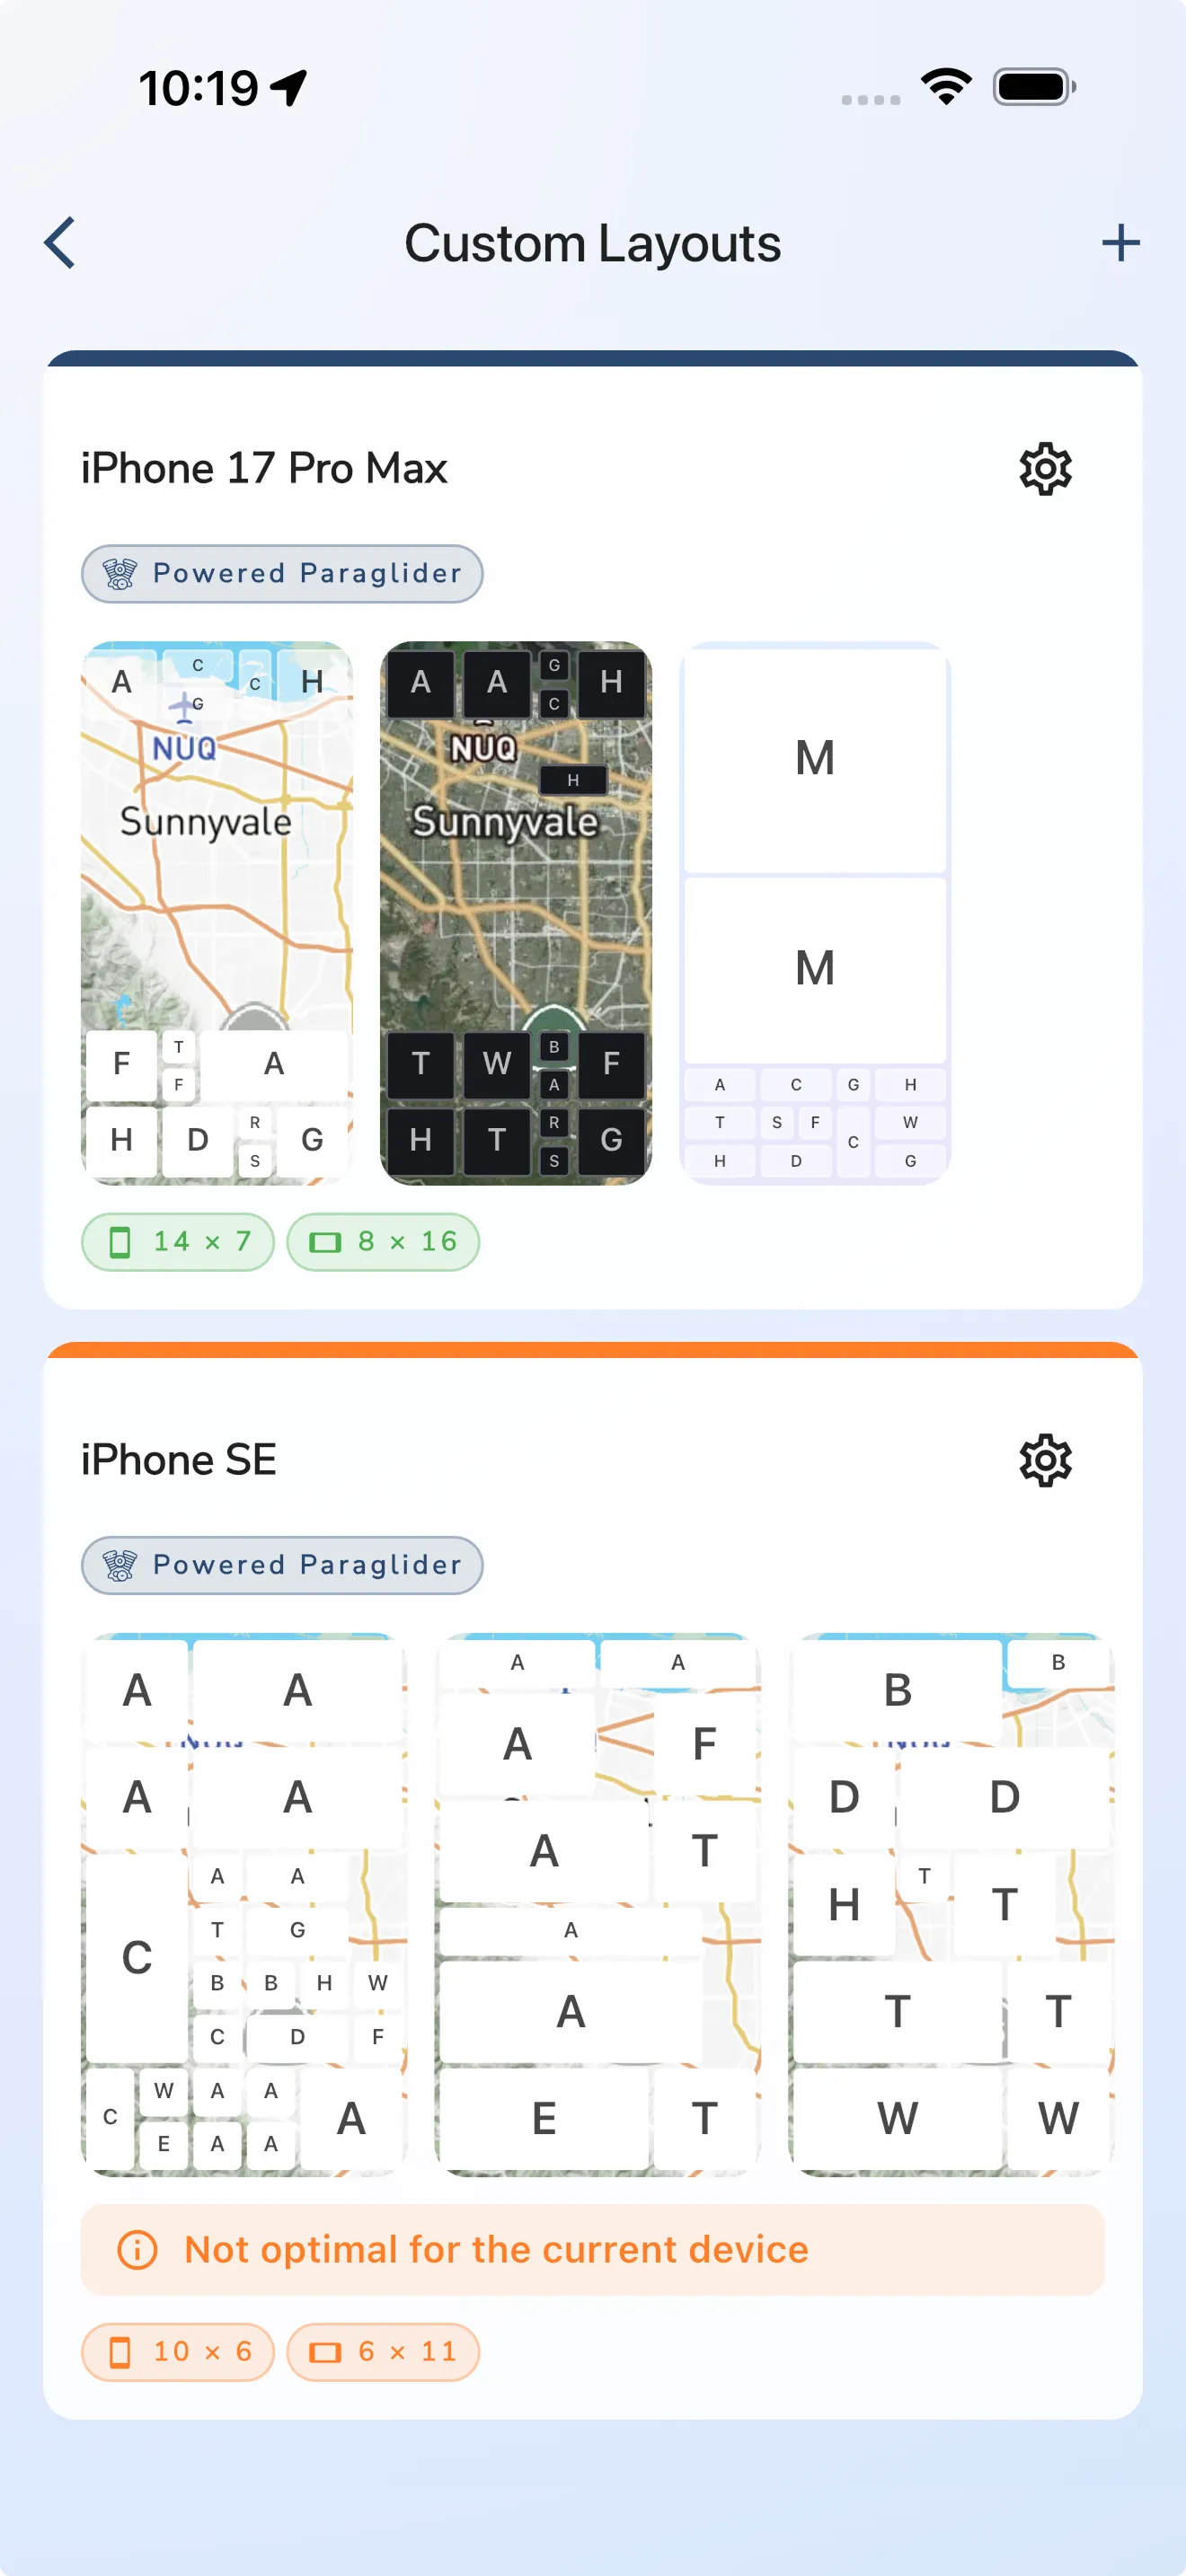
- Open Record > Recorder Settings > Custom Layouts.
- Tap Add Layout or the + at the top.
- Enter a Layout Name. Use at least three characters.
- Choose one or more aircraft Categories. The categories help Gaggle recommend the layout for the right type of aircraft.
- Choose the orientation settings. You can lock the layout to Portrait or Landscape, or allow the layout to auto-rotate with your device.
- Choose how you will change screens in portrait and landscape. You can enable a horizontal swipe, a vertical swipe, or both.
- Tap on Show me how to learn how to change screens.
- Tap Next.
Gaggle then works out the grid for your device automatically. On some devices, you may need to turn off screen lock and rotate the device so Gaggle can measure both orientations.
When you see Grid setup complete, tap Create. The new layout opens with no screens, ready for you to add one.
New layouts start with these orientation defaults:
- Orientation is locked.
- Portrait is selected.
- Portrait screens use vertical swipes.
- Landscape screens use horizontal swipes.
Change layout settings
From the Custom Layouts list, tap the settings icon for a layout. You can change:
- The layout name.
- The aircraft categories that use the layout.
- Whether the recorder locks to portrait or landscape.
- Whether the layout changes screens with a horizontal swipe, a vertical swipe, or both.
Delete a layout
Open the layout settings, scroll to the bottom, and tap Delete. Confirm the deletion when asked. NB: Deleting a layout also deletes all of its screens and widgets.
Create and edit screens
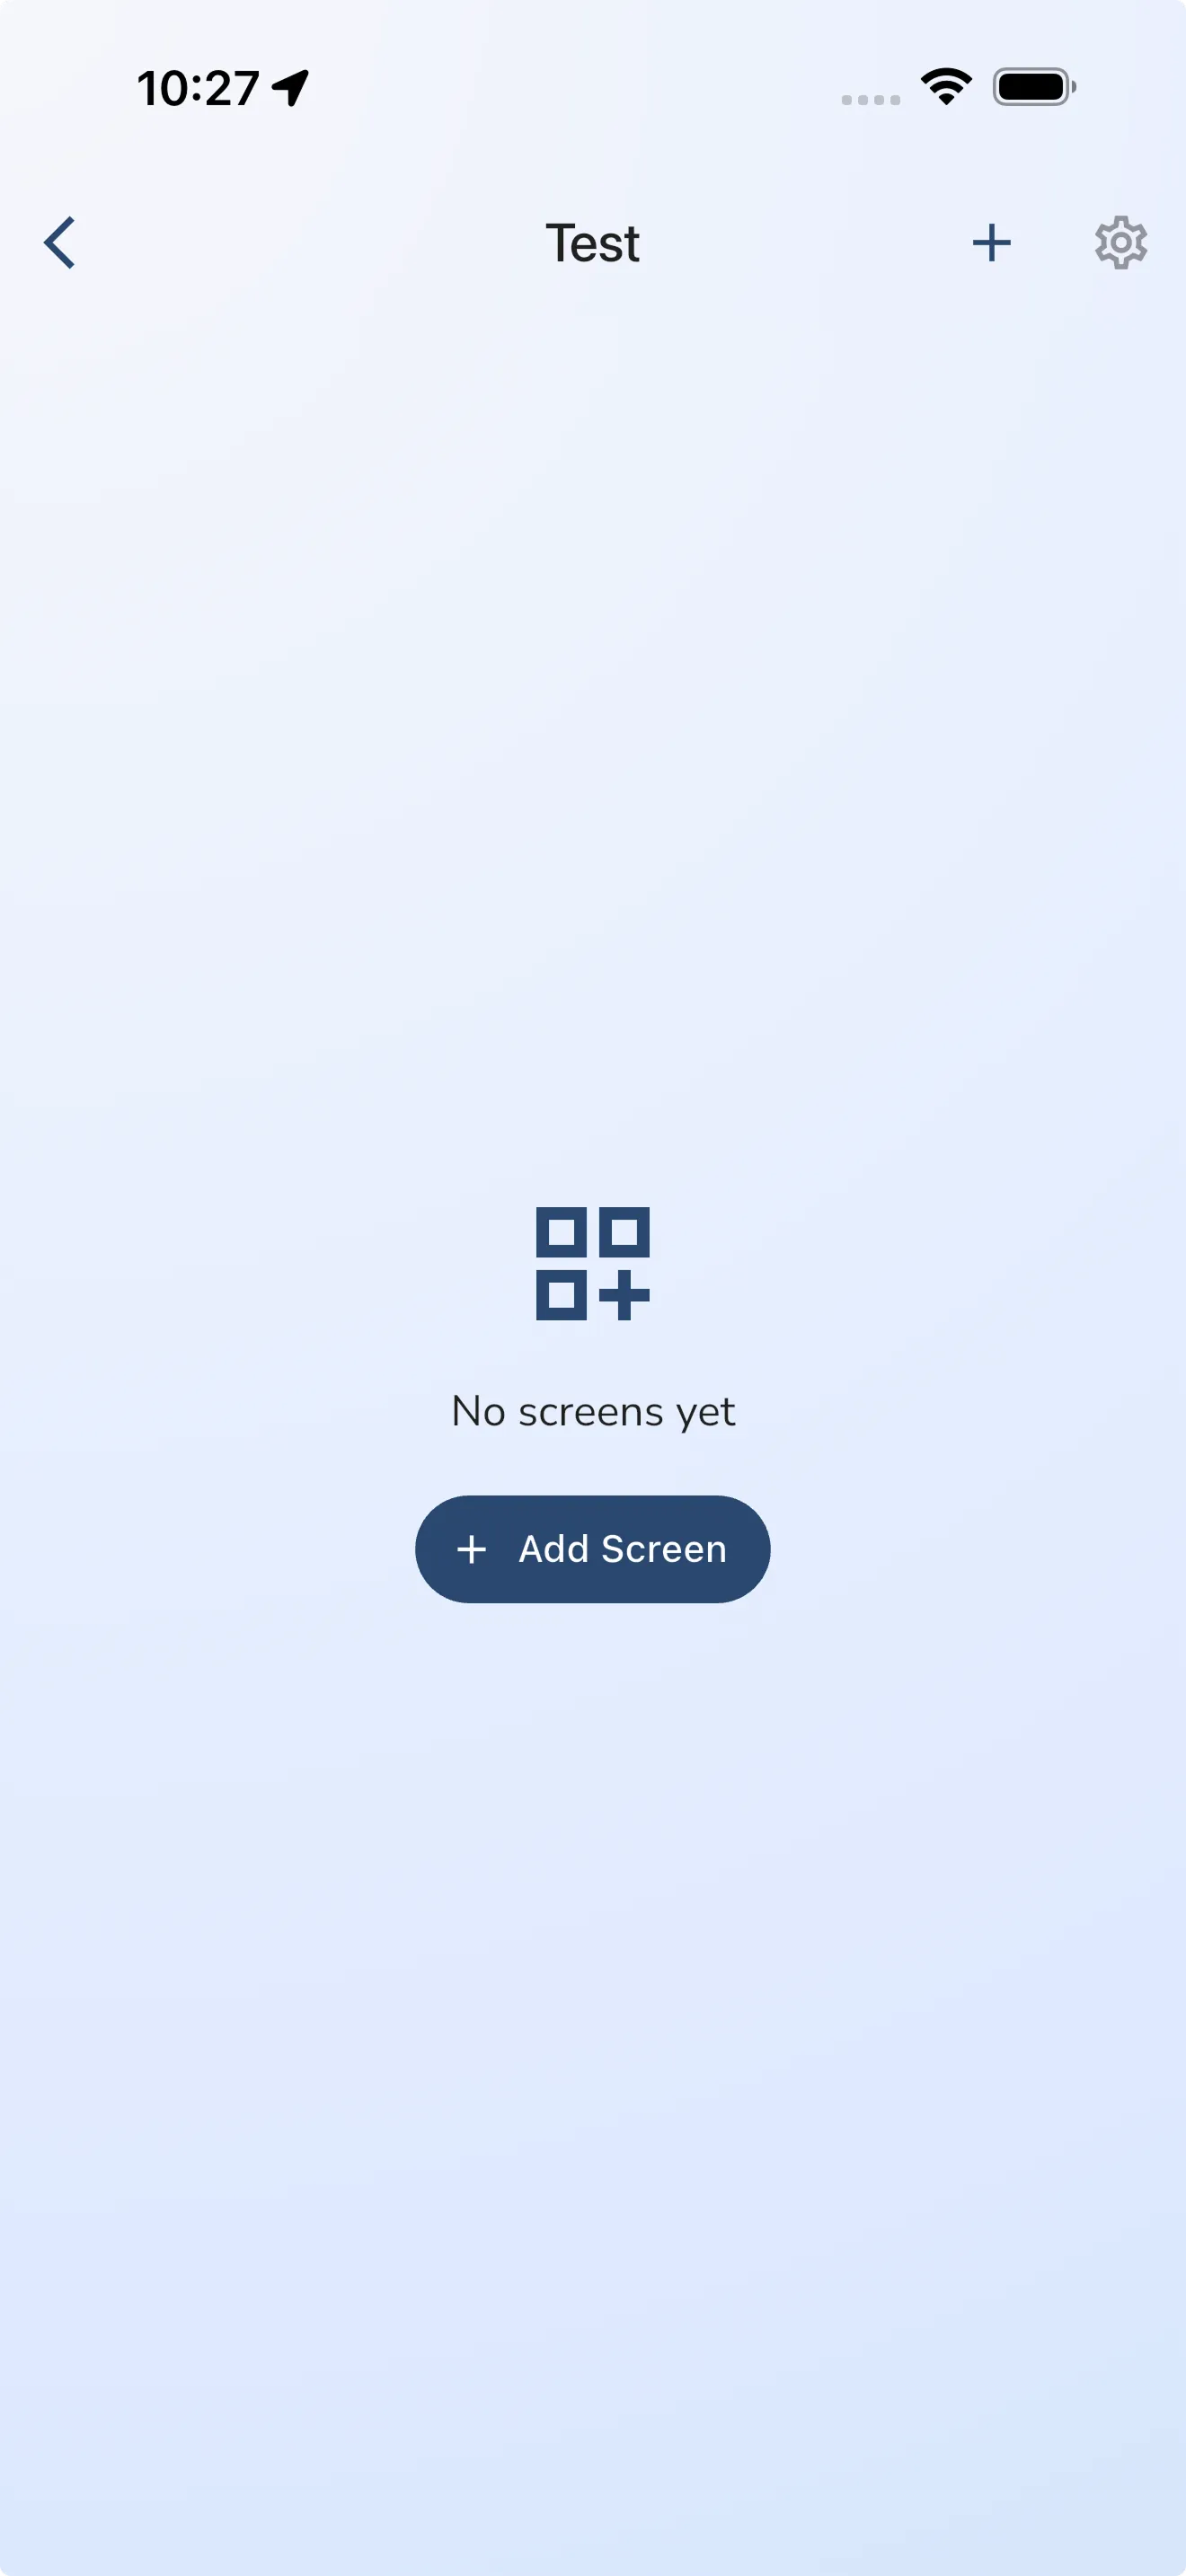
Create a screen
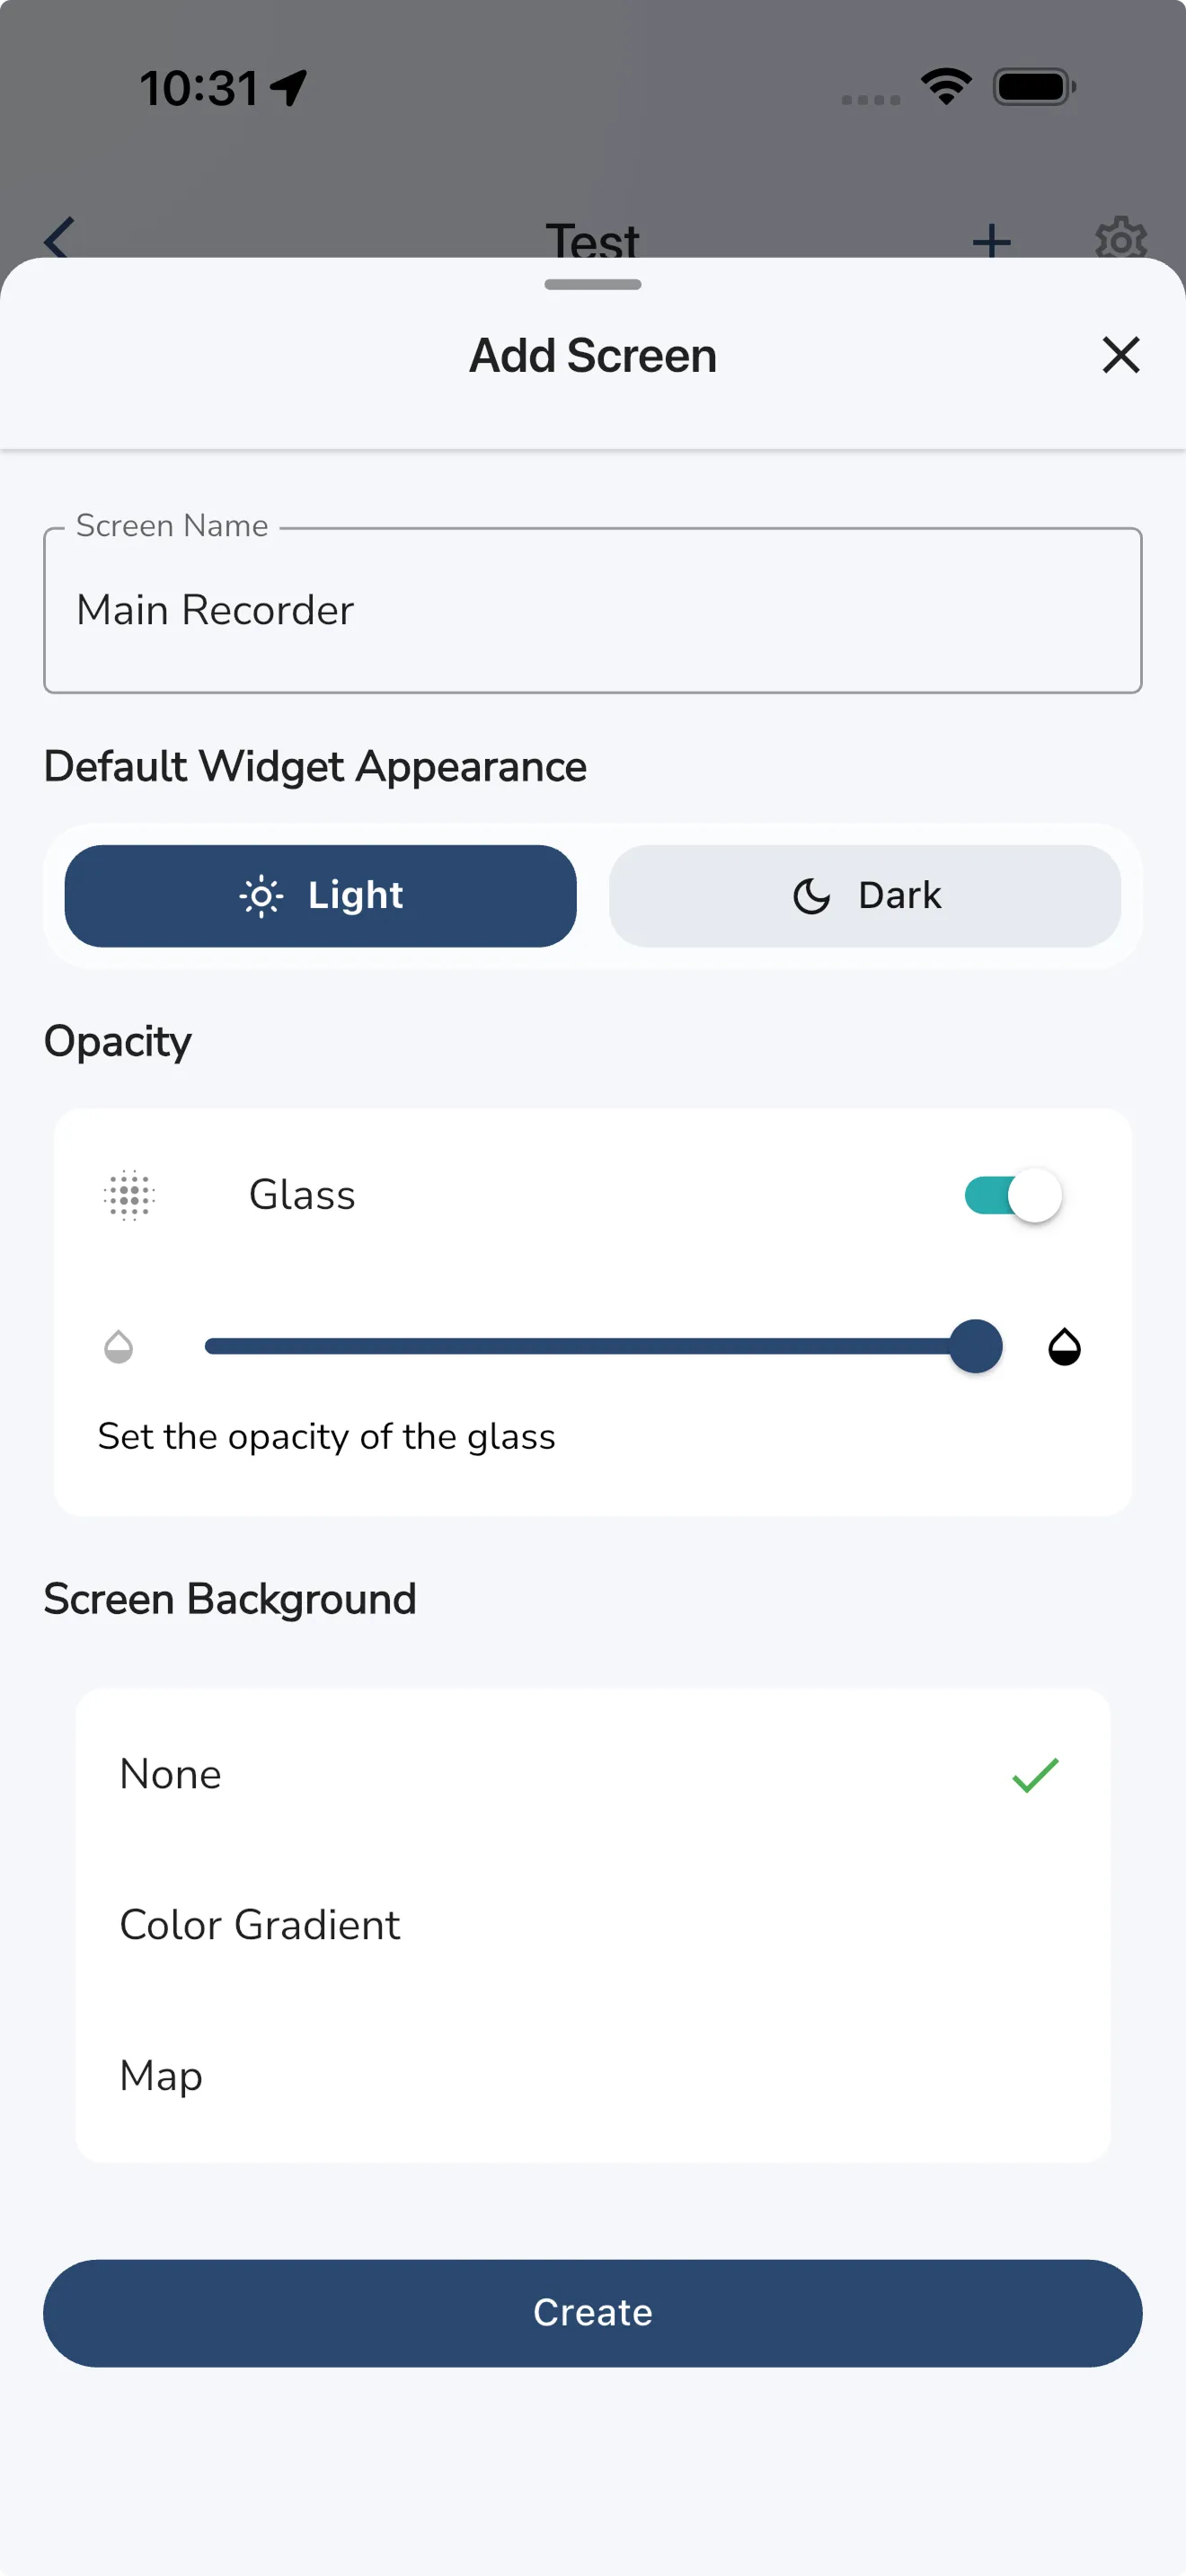
Open a layout and tap Add Screen or the + icon at the top. Enter a Screen Name, then choose the screen defaults before tapping Create. These settings can be changed later.
The screen defaults include:
- Default Widget Appearance - choose Light or Dark.
- Glass - turn the glass effect on or off and set its opacity.
- Screen Background - choose between None, Color Gradient, or Map.
If you choose Color Gradient, you can set the Top Color and Bottom Color. If you choose Map, you can adjust the map settings for that screen.
These are defaults for widgets added to the screen. You can change an individual widget at any time.
Move between screens while editing
The screen editor shows one screen at a time as a grid preview. Swipe through the previews to move between screens:
- In portrait, swipe up or down.
- In landscape, swipe left or right.
When there is more than one screen, the screen indicators show which screen is selected. You can also tap an indicator to jump to a screen.
Edit screen settings and defaults
Tap the settings icon while a screen is open. From Screen Settings, you can rename the screen and change its default appearance, glass effect, background, gradient colors, or map settings.
Delete a screen
Open Screen Settings, tap Delete, and confirm. A layout must keep at least one screen, so the delete action is disabled when it is the only screen. NB: Deleting a screen removes all widgets.
Reorder screens
- Tap the grid icon in the top-right corner.
- Long-press a screen preview and drag it to its new position.
- Release it, then tap Done.
The new order is the order used in the recorder. You can add/delete screens from the reorder view as well.
Add and arrange widgets
Add a widget
- Open the screen you want to edit.
- Tap an empty grid cell.
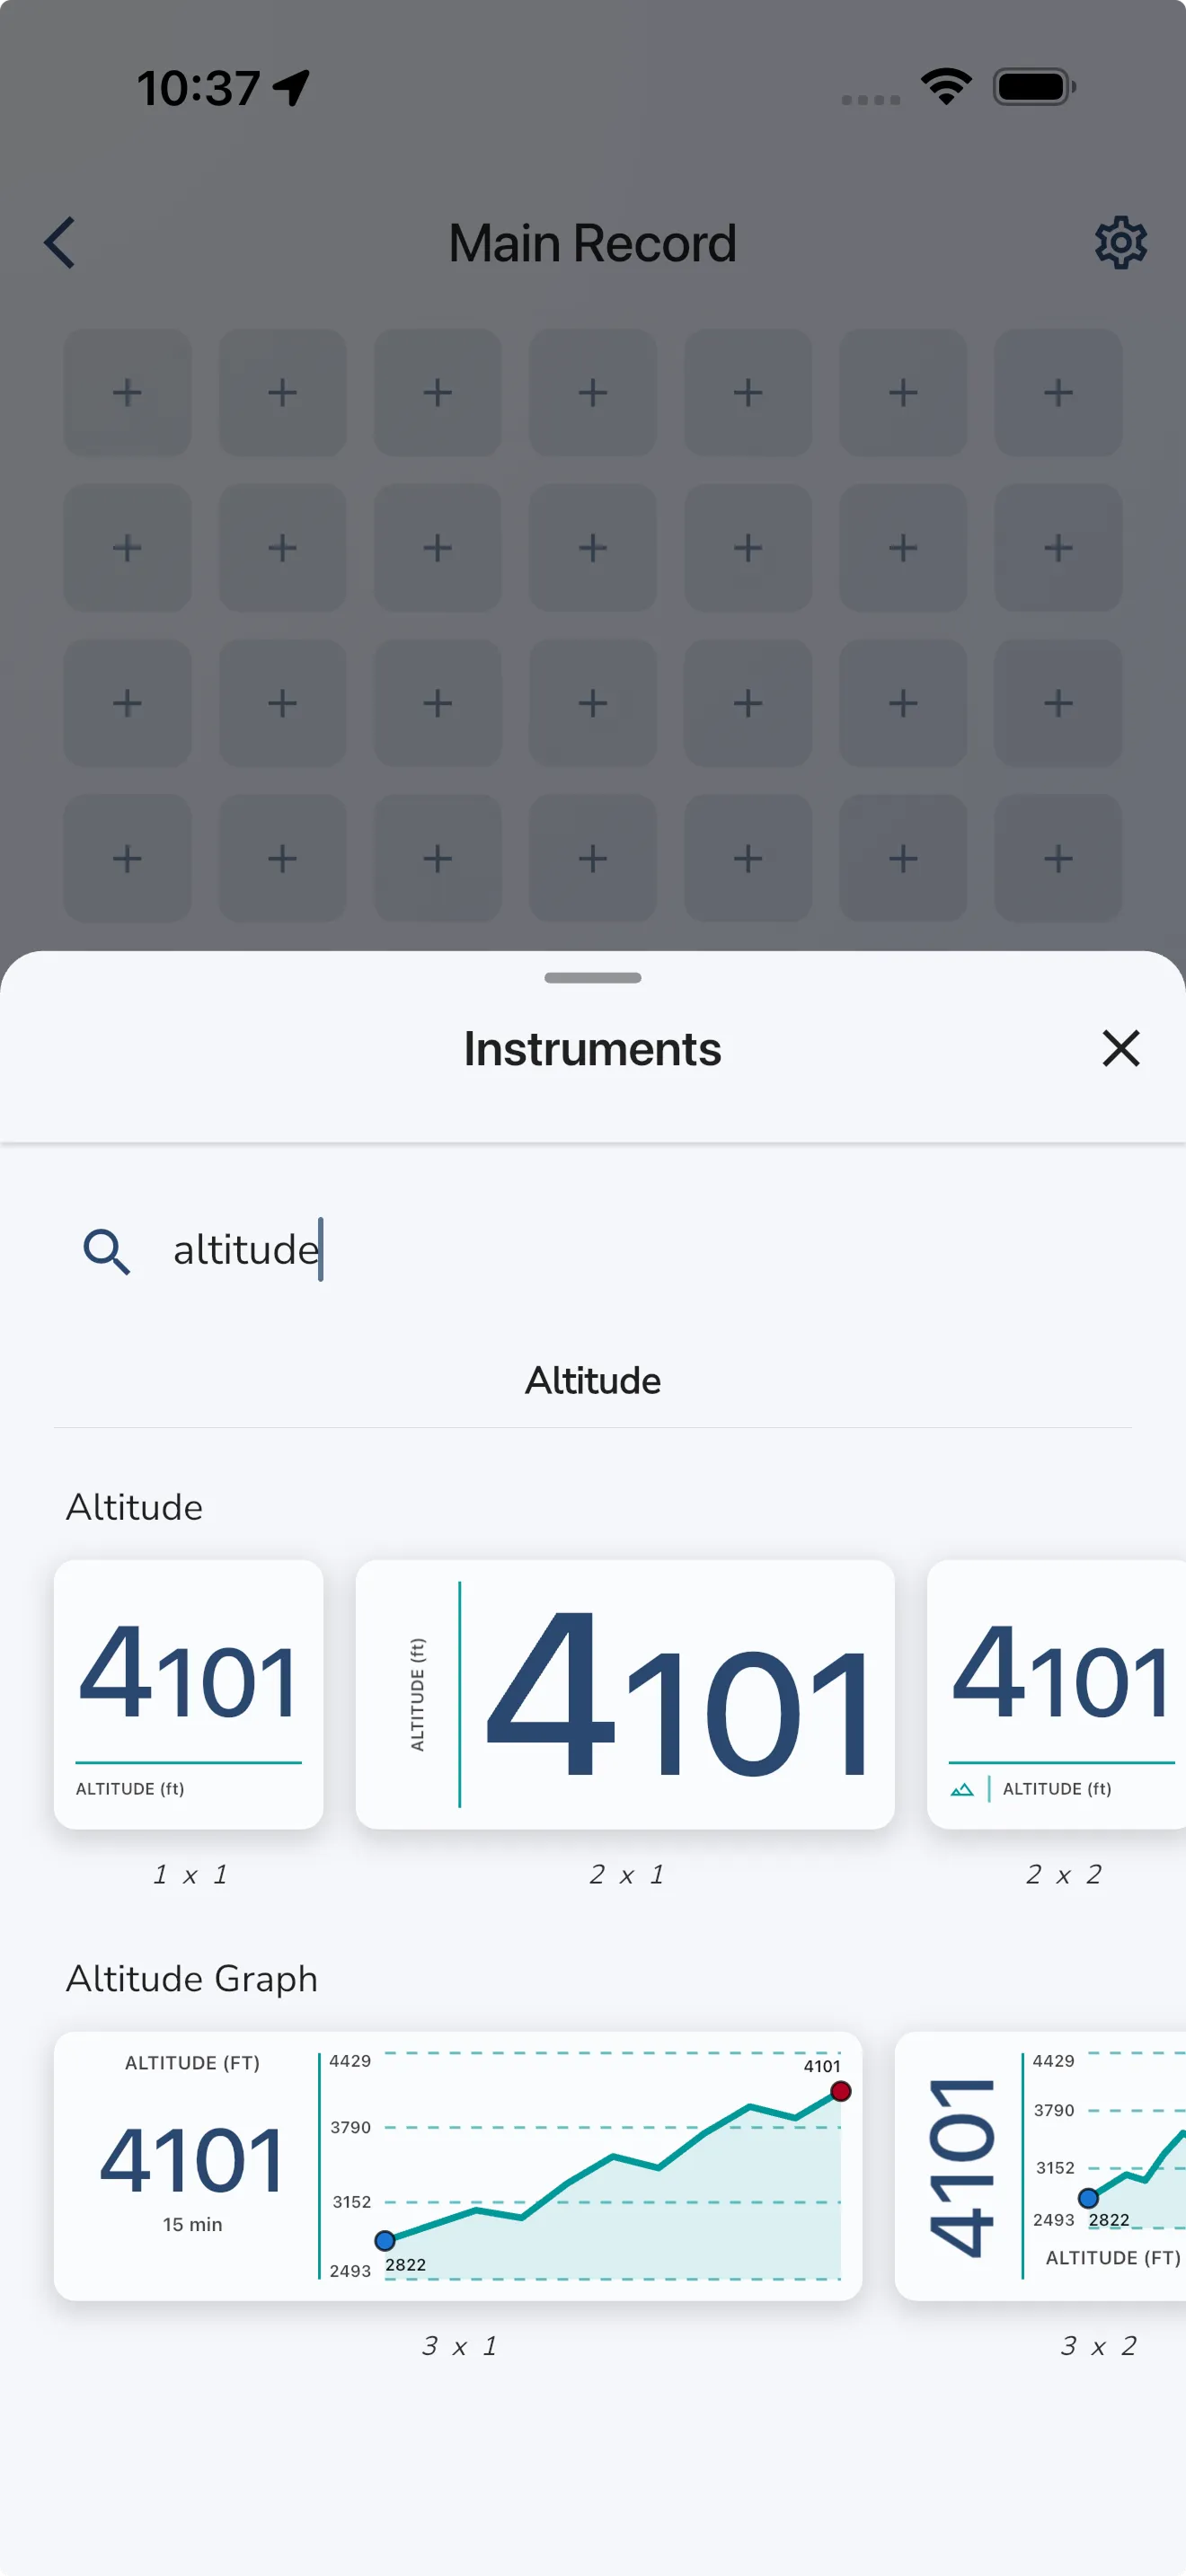
- Browse the Instruments list, or use Search instruments to search for a specific instrument.
- Tap the preview size you want to use.
The widget is added to the selected empty space. If there is not enough room, Gaggle shows a message and does not add it.
The picker includes instruments such as altitude, speed, airspace, map, wind, thermal, traffic, time, fuel, recording controls, and more. The available instruments can depend on the current app version.
Open widget settings
Tap a widget in the editor to open its settings. Depending on the widget, you may see:
- Sizes - choose a different preset size.
- Instrument-specific settings, such as map or graph options.
- Units - use the default unit or choose an override.
- Appearance - choose Light or Dark when the widget supports it.
- Glass - turn the glass effect on or off and adjust its opacity.
- Interaction > On tap - choose what happens when you tap the widget while recording, such as opening altitude, thermal, airspace, traffic, friend, engine, or disabling the on tap action.
Changes are saved as you make them.
Remove a widget
Tap the widget, scroll to the bottom of its settings, and tap Delete. The widget is removed from the current screen and orientation.
Resize a widget
You can resize a widget in either of these ways:
- Tap and hold while dragging the handle in the bottom-right corner of the widget.
- Open widget settings and choose another size from Sizes.
The widget must fit in the grid and cannot overlap another widget. Some widgets offer preset sizes, while others allow more flexible resizing.
Move a widget
Tap and hold on the widget (not the resize corner), then drag it to move it.
Edit the other orientation
The portrait and landscape versions of a screen have separate grids and widget placements. To edit the other one:
- Open the screen editor.
- Rotate the device.
- Wait for the editor to switch to the new orientation.
- Add, remove, move, or resize widgets as needed.
Changes made in portrait do not automatically rearrange the landscape version, and vice versa. Even when the layout is locked for recording, the editor lets you rotate the device so you can prepare both orientations. Ensure that your device screen rotation is active.
That’s all you need to create your first layout. You can create as many as you want!
Use a custom layout while recording
Select a layout before starting
- Open Record and select your equipment.
- Tap the layout tile below the task selection. It shows Gaggle Default or the currently selected custom layout.
- Tap the layout you want to use.
- Close the chooser and tap Start Recorder.
Gaggle remembers the last custom layout selected for each aircraft category. If that layout is no longer available, Gaggle uses Gaggle Default.
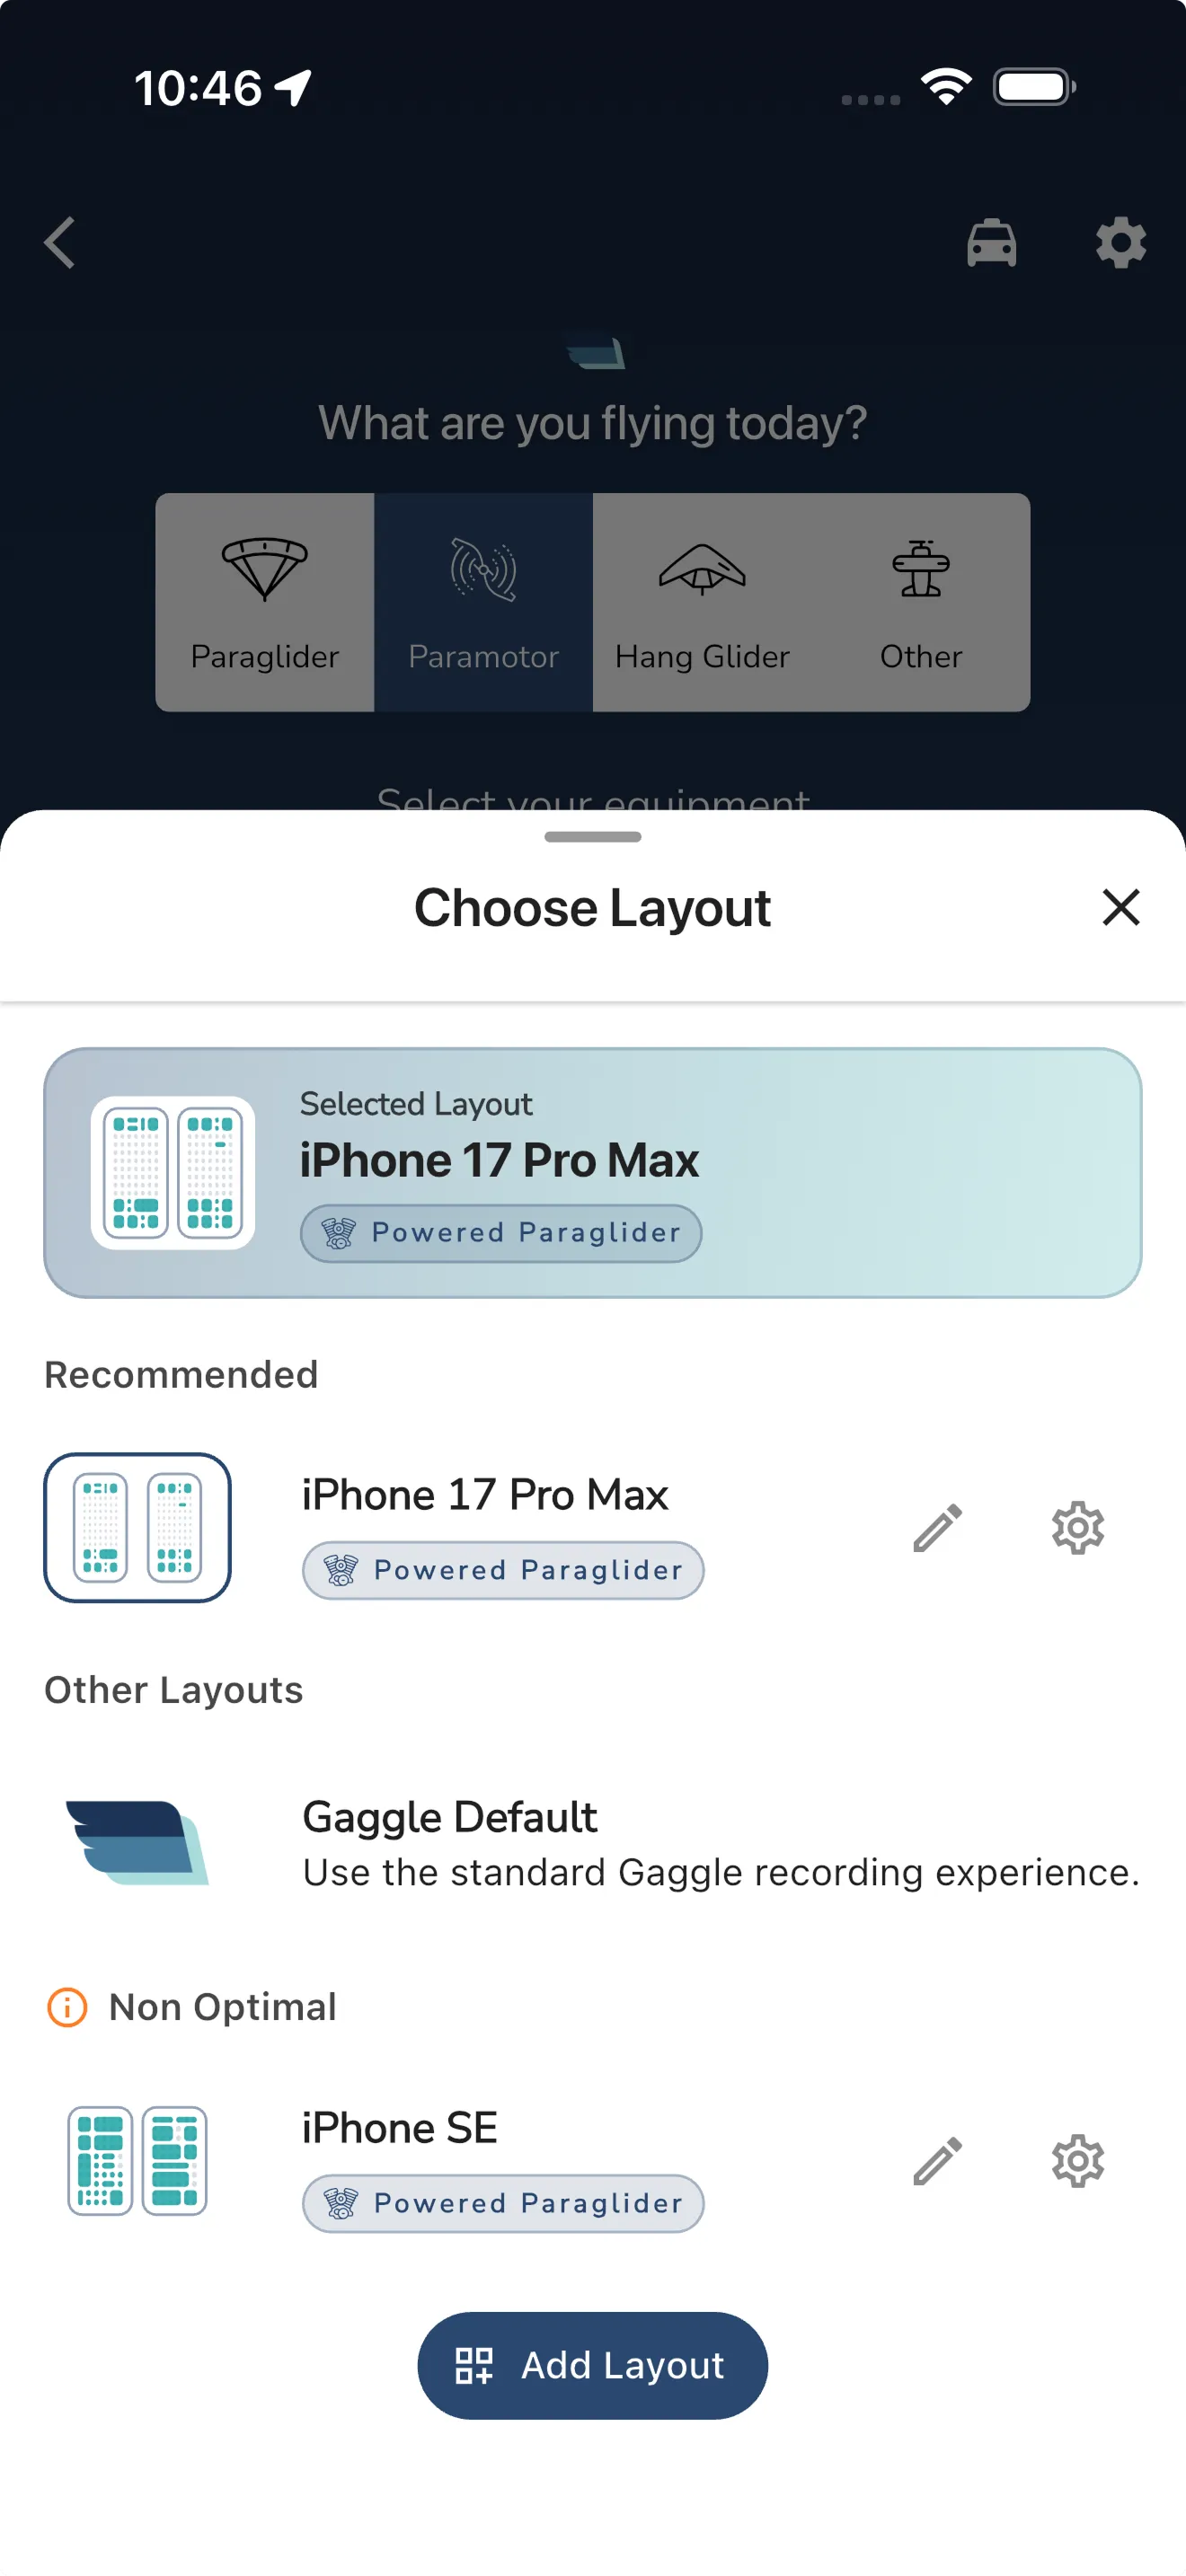
Which layouts are shown and how are they ordered?
The chooser checks the aircraft category you selected and the grid size of the current device orientation. It shows layouts in these groups:
- Recommended - compatible layouts created for the selected aircraft category.
- Other Layouts - other compatible custom layouts, followed by Gaggle Default.
- Non Optimal - custom layouts whose grid does not match the current device orientation.
Within the custom-layout list, layouts are shown alphabetically by name. A layout can still be selected from Non Optimal, but it may not use the available screen space as well as a compatible layout.
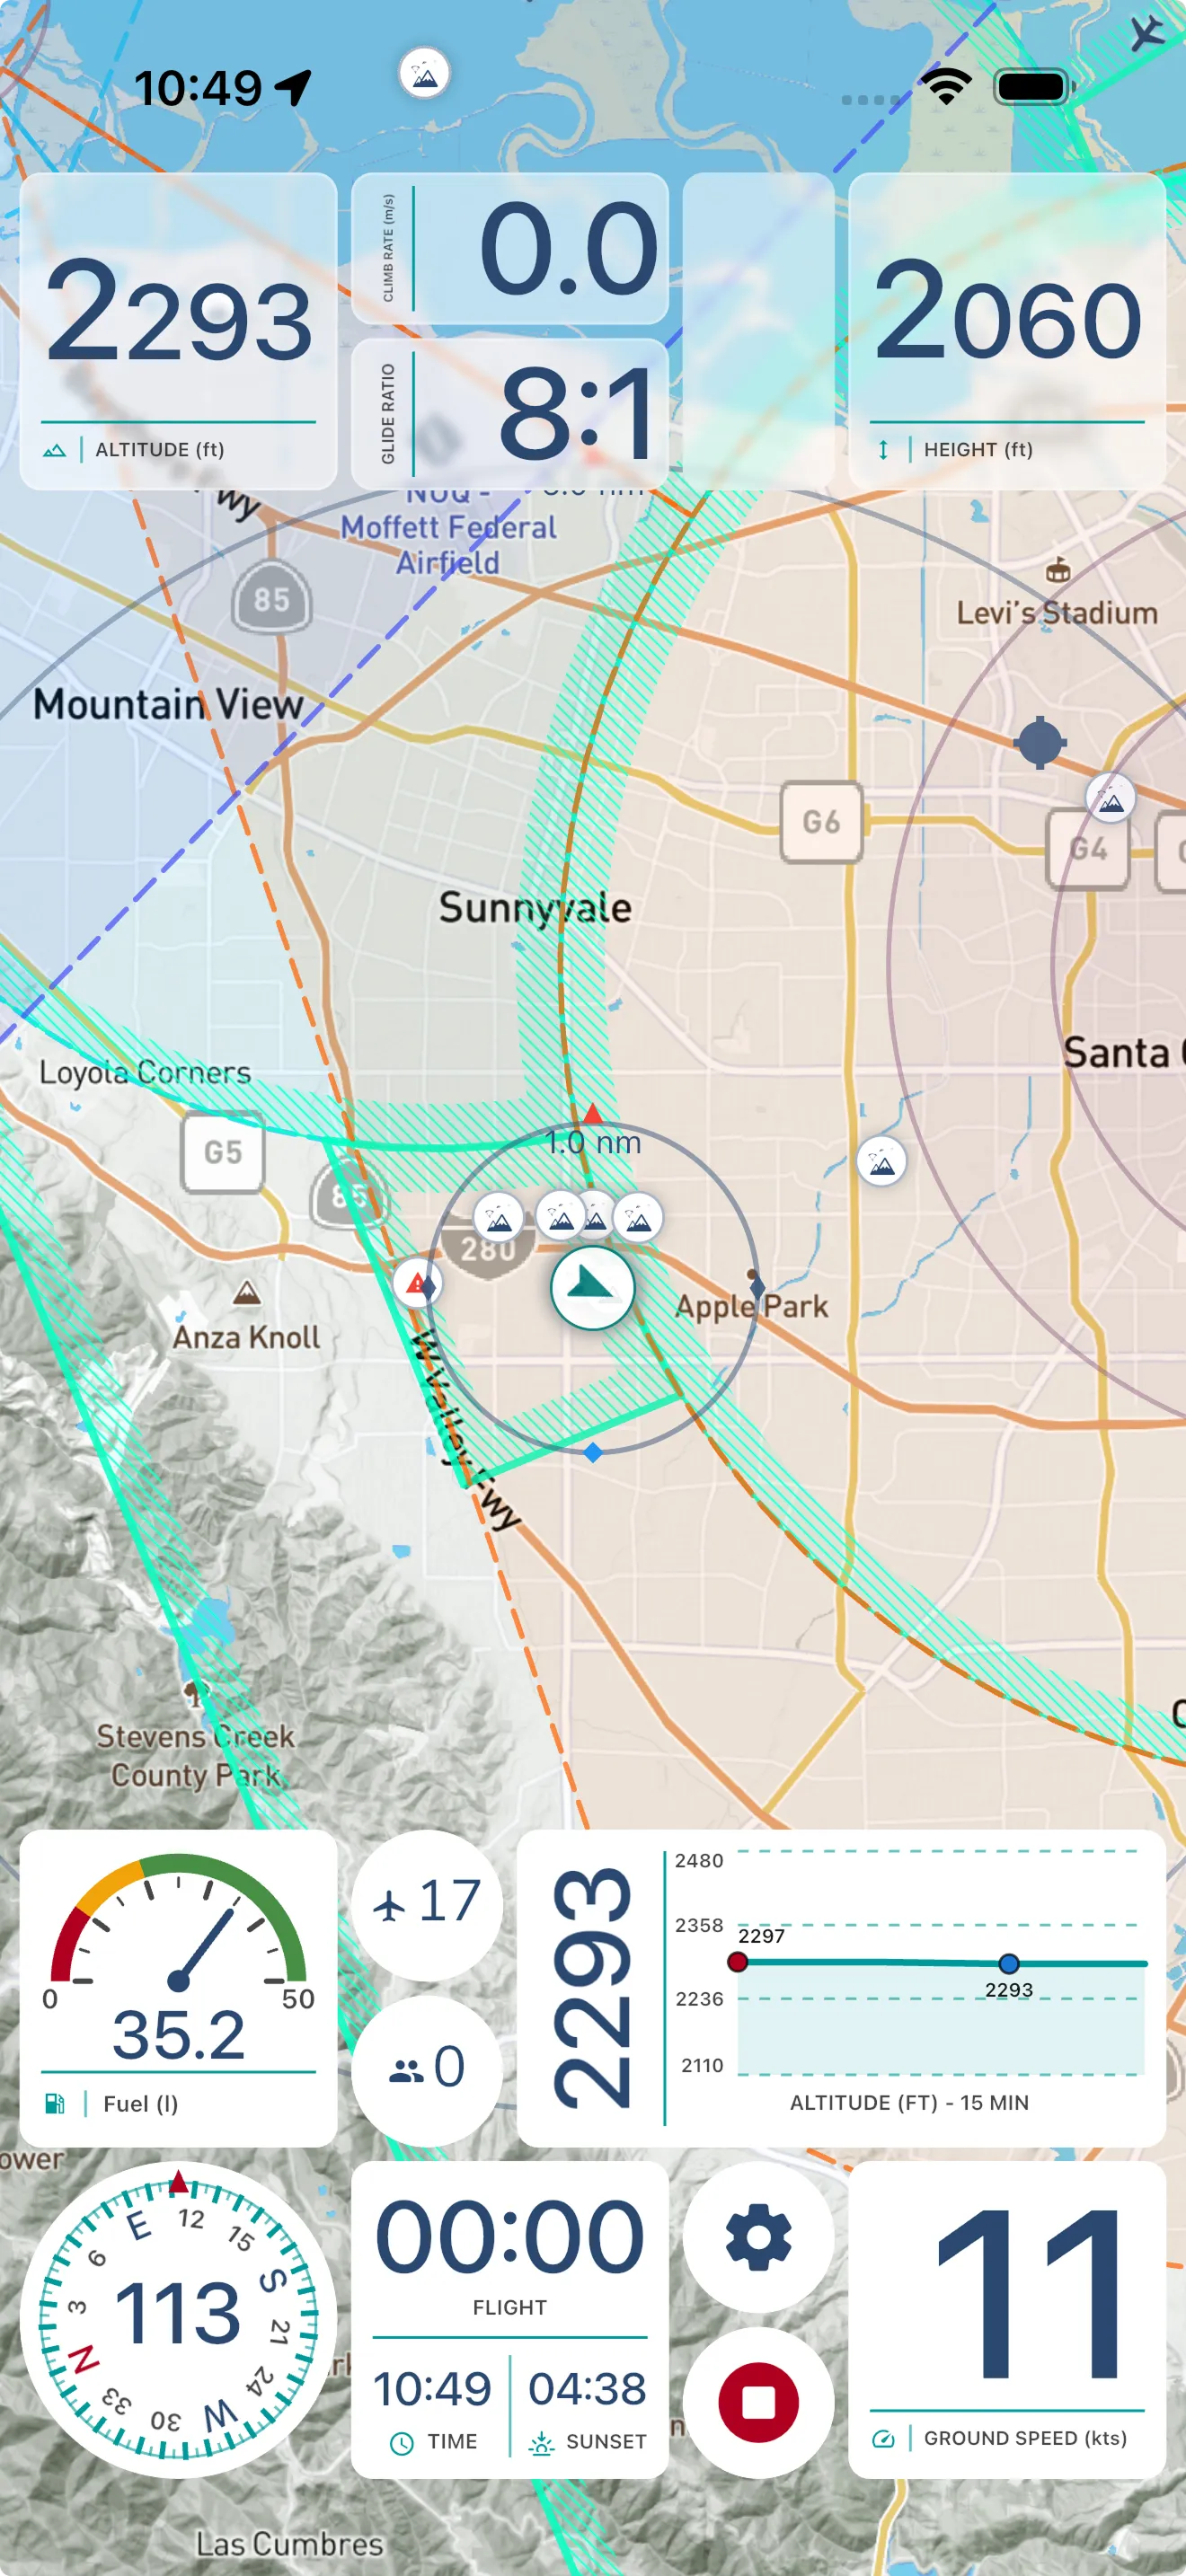
Swipe between screens in the recorder
Your custom screens appear in the order you set in the editor. The recorder starts on the first screen, and the final page is the permanent Recording Summary page.
Use the swipe direction enabled in your layout settings:
- For a horizontal swipe, start at the top or bottom edge and swipe left or right.
- For a vertical swipe, start at the left or right edge and swipe up or down.
You can enable both directions if you want either gesture to work. You can also add Previous Page and Next Page widgets to a screen for on-screen navigation.
The page indicator and screen name appear briefly when you change screens. After the Recording Summary page, navigation wraps back to the first custom screen.
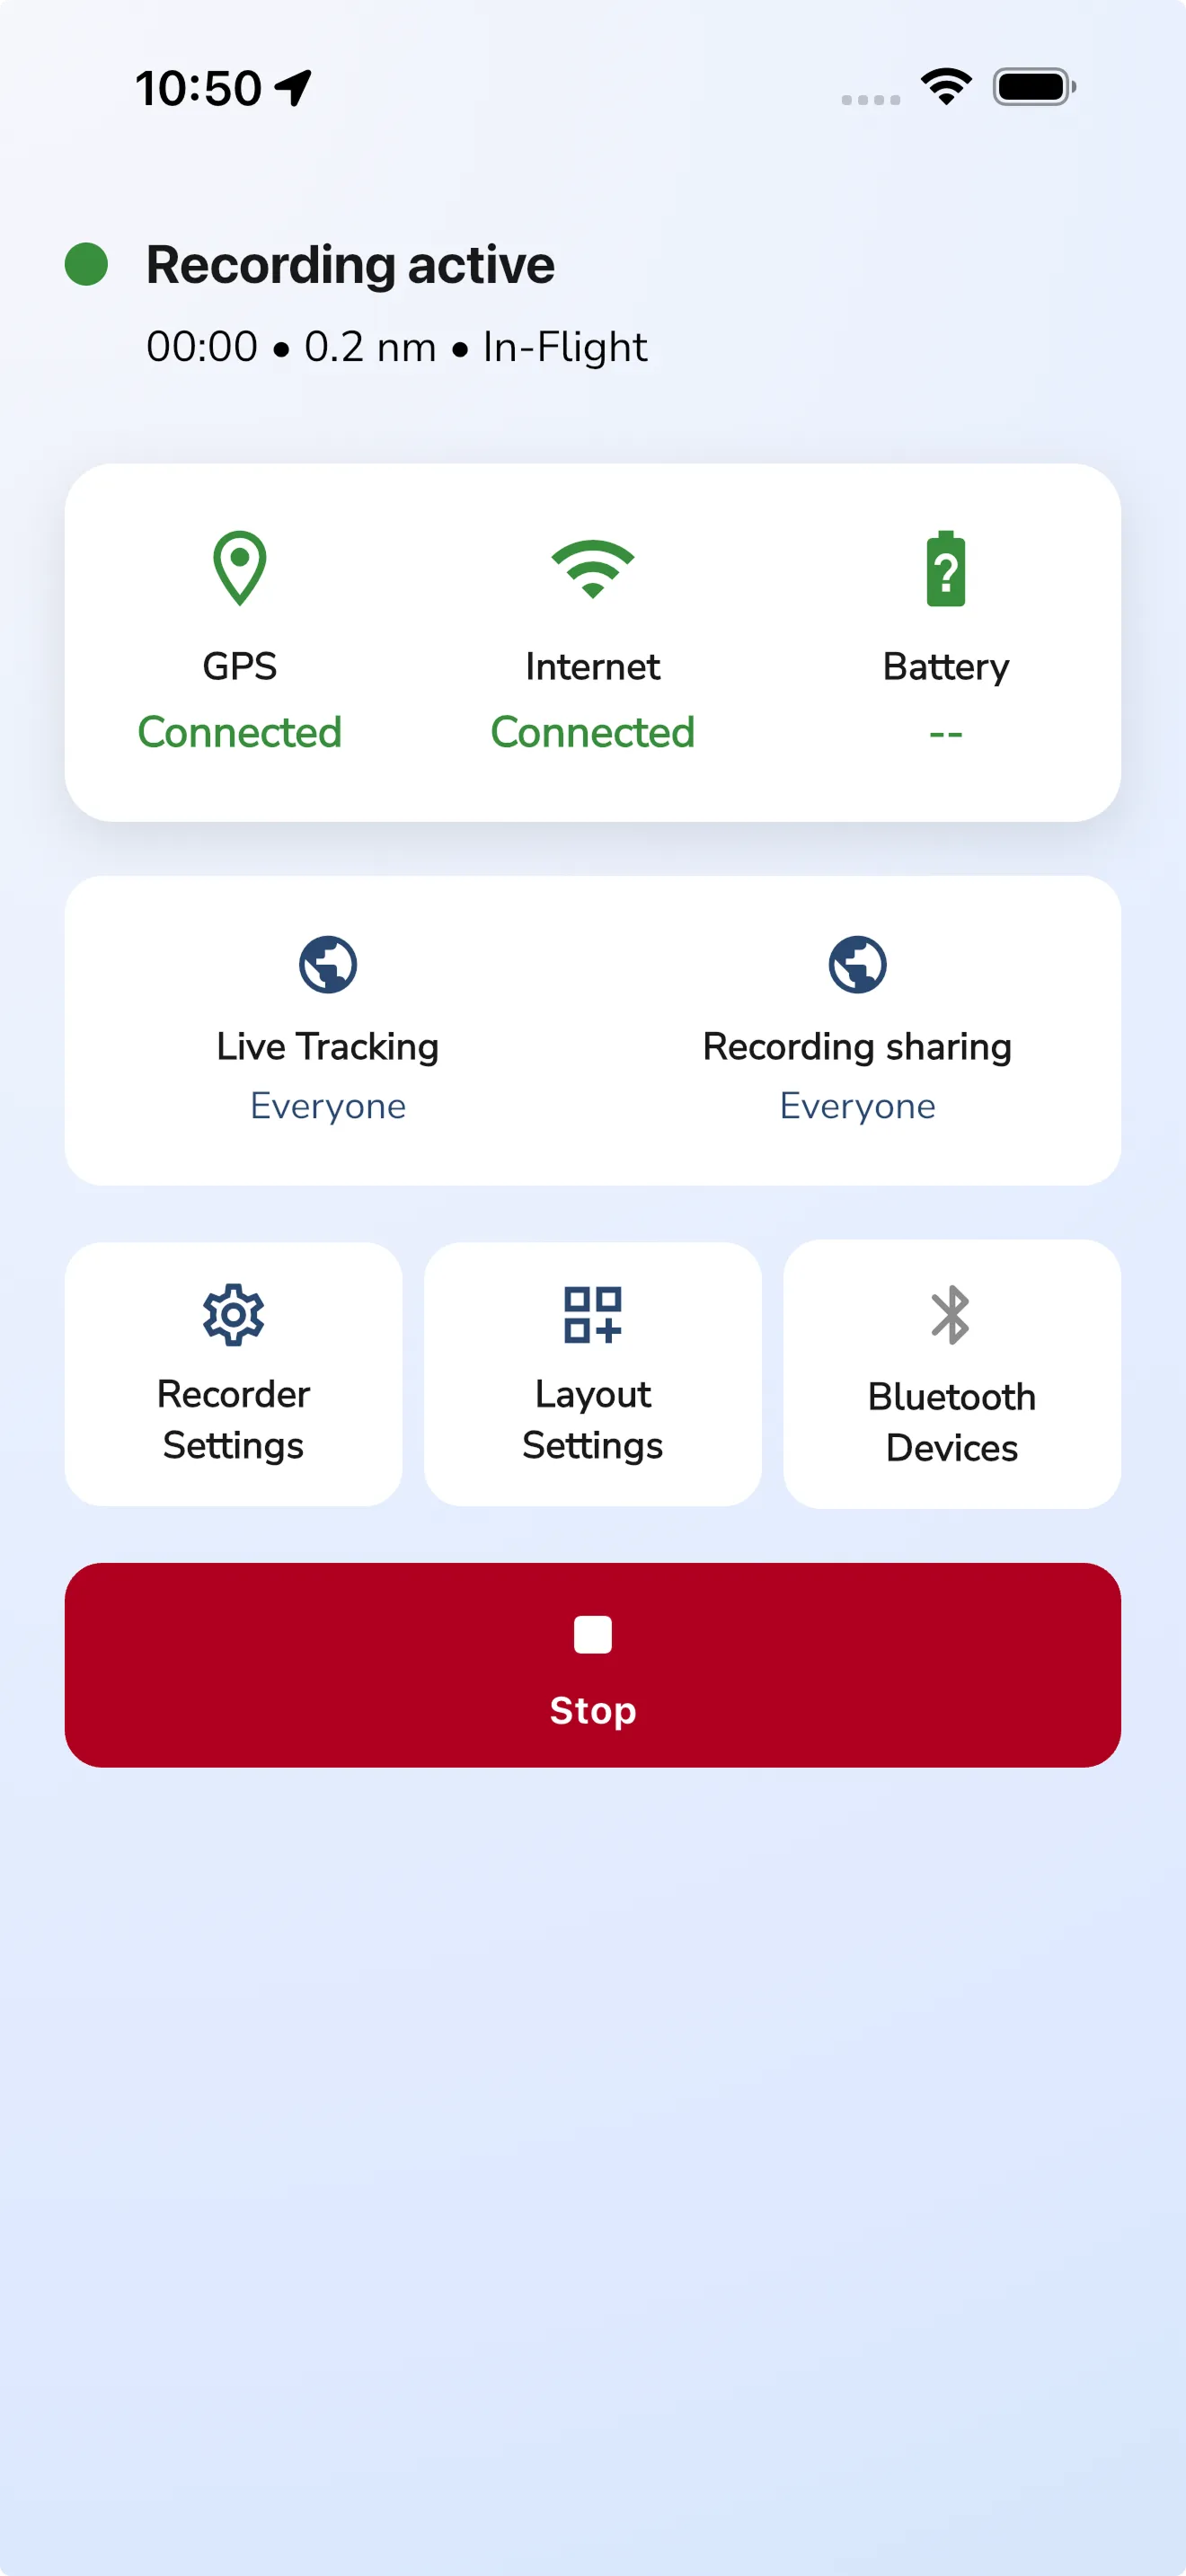
Recording Summary
The custom recorder automatically adds a Recording Summary page after your last custom screen. It is not an editable screen in the layout editor, and it cannot be removed.
While recording, this page shows:
- Whether recording is active or grounded.
- Recording duration and distance.
- GPS, internet, and battery status.
- Live tracking and recording-sharing status.
- Buttons to easily navigate to Recorder Settings, Layout Settings, and Bluetooth Devices.
- A Stop button for ending the recording.
Tap Stop and confirm when you are ready to end the flight. Gaggle then saves the recording and opens the saved recording details when the recording has been saved successfully.
Helpful notes
- The standard Gaggle Default layout remains available at any time.
- Portrait and landscape arrangements are saved separately for every screen.
- A custom layout must have at least one screen to be useful in the recorder.
- If a widget will not fit, move or resize existing widgets before adding it.
- If you change the layout’s orientation lock or swipe directions while recording, the new behavior applies to the recorder after the settings are closed.